You will be surprised to know that there are more than one ways to rotate and flip images in Google Docs but we will share the simplest one. We will cover everything you need to know so you would be able to do it anytime, anywhere. Let’s begin.
How to Rotate Images in Google Docs Web
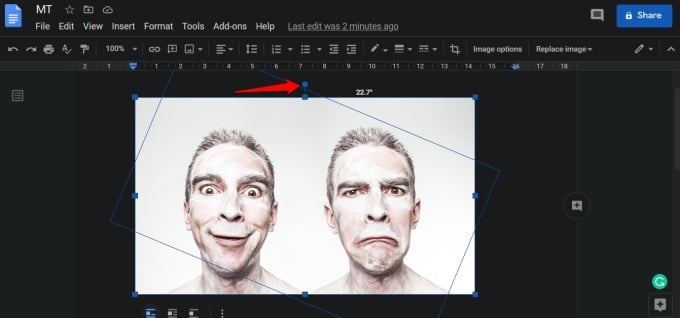
You can add images to a Google Docs by using Insert > Image or drag-n-drop from your computer. Click on the image once and you will notice a blue boundary appear around the image. Each corner is denoted by a blue square but you will also notice a blue circle on the upper-middle side of the image. While it is obvious that the blue square icons are to adjust the width and length of the image, the blue circle is for rotating the image. Click and hold the icon with your mouse and move around to see the change in angle.
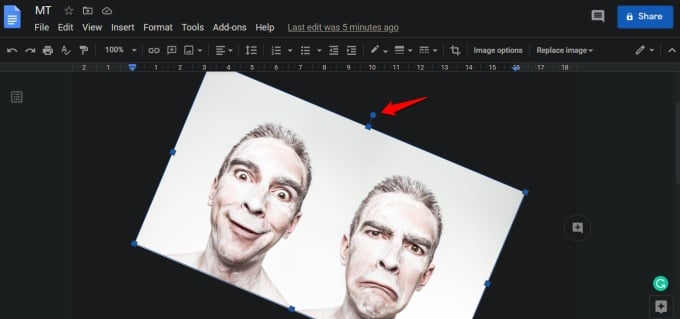
You can visualize the new angle in real-time by following the blue border of the image or outline. Google Docs also displays the new angle as you keep dragging the image into a new position. The image will tilt when you let go of the mouse.
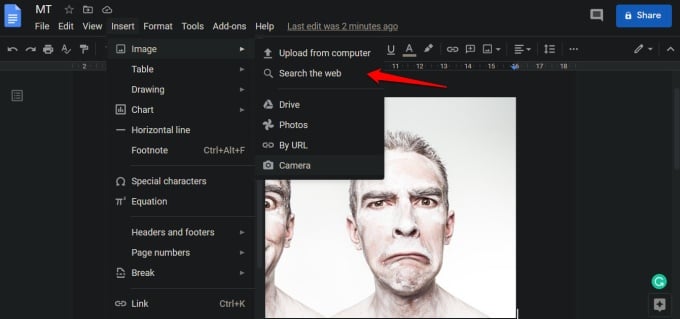
Remember the Insert option we discussed above? You can add images via Google’s Drive and Photos apps, URL, searching the web, computer HDD/SSD, and even your camera using that. The one thing common among all these methods is how you rotate images in Google Docs. You should see the familiar blue circular icon at the top upon selecting the image.
As there is no way to enter a value manually, you will have to rely on the mouse to rotate the image to the required degree with precision to get the desired results. While this is not difficult, it is not easy too, especially if you are using an old dusty mouse pad or laptop trackpad.
How to Flip Images in Google Docs Web
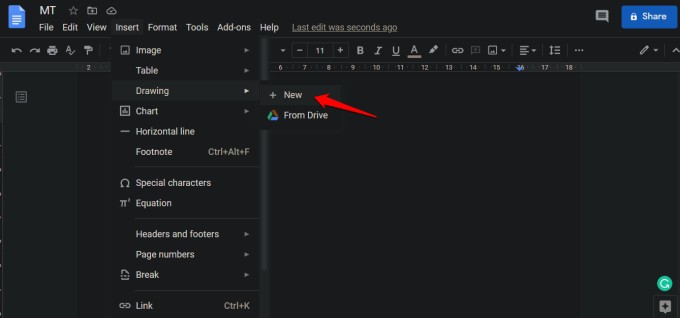
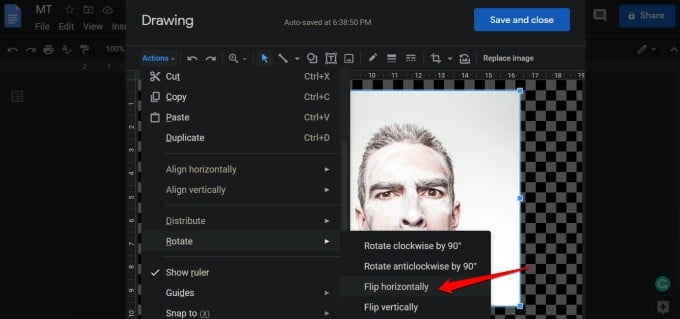
Flipping the image means you are reversing it. The left side of the image will be visible on the right and vice versa. Unfortunately, the steps are not so simple as the explanation of what it does. Still, there is a way. Right-click on the image you want to flip inside Google Docs and select Copy. Press Ctrl+Enter below the image to open a new blank page. When that happens, select Insert > Drawing > New.
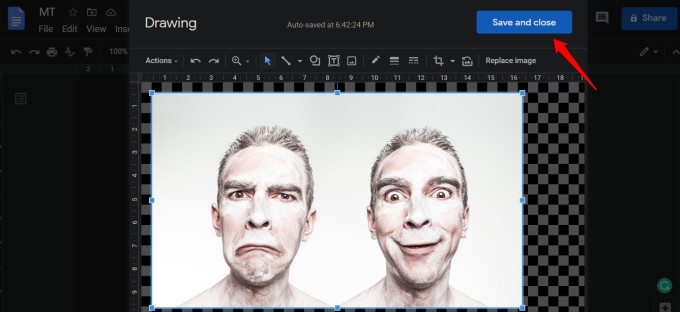
You will now paste the copied image here. Either press Ctrl+V or right-click to select paste. You should view the image now. Go to Actions > Rotate and you will find two options to flip the image horizontally or vertically.
Don’t forget to click on the Save and Close button to save changes. I know what you are thinking. What about all the text? Well, you will have to copy-paste it again but that is the way.
Right now, there is no other way to flip images on Google Docs except this. I hope Google will make it easier and more user-friendly in the future but until that happens, at least, you have an option.
Wrapping Up: Rotate and Flip Images in Google Docs
There is no way to rotate or flip images in Google Docs mobile apps. Google Docs is not known for its smooth and extensive formatting options. No. It is known for communication and collaboration. Formatting tools take a back seat but hopefully, that will change in the future. For now, you will have to make do with what you have available to you. It is really easy to flip images in Docs documents even though it is not very apparent at first to many users. Adding a pop-up message of some kind upon hovering over the icon with your mouse pointer could have made it easier to discover. The rotate feature is hidden deep within the drawing tool for some reason. Not even very obvious to find but works alright. Hopefully, you liked what you read and do mention in the comments below if you found another way to fix the issue. You can also share your thoughts or additional Google Docs tips and tricks there. Notify me of follow-up comments by email. Notify me of new posts by email.
Δ


