This step by step instructions are intend for BSNL broadband customer those who wants to configure wireless modem for accessing internet. This is not a Himalayan task if you can follow the step by step instructions described here and screen shots. This screen shots are based on most available BSNL modem models. If your configuration page is different from the shown pictures, please contact your nearest bsnl exchange for configuration or click here for a new configuration guide. Connect your computer Ethernet port with your Router port via Ethernet cable (only one time to configure modem). Turn on your computer and modem. Verify that you are able to connect to internet using the computer. Verify that your modem supports wireless connection. It will be normally having a small antenna and lights for “Wireless” or “WLAN” etc.
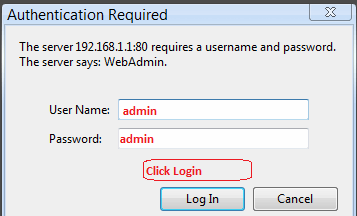
Open your web browser (Internet explorer, firefox, Chrome etc) and type 192.168.1.1 on your address bar and press Enter. You will see a prompted box for username and password. Input username:admin and password:admin and click Login.
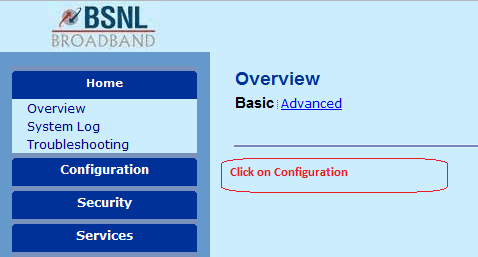
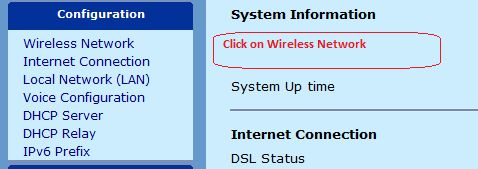
You will see a blue background page as shown below. Click on configuration. Another menu appear below. In that menu, click on wireless network.
In this screen, first click on MAC address filter.
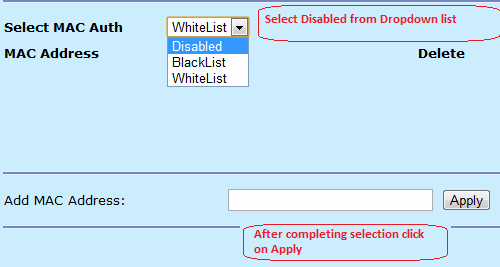
In the drop down list, select Disabled. Click on Apply and wait for completing the page loading.
Then click on Basic settings.
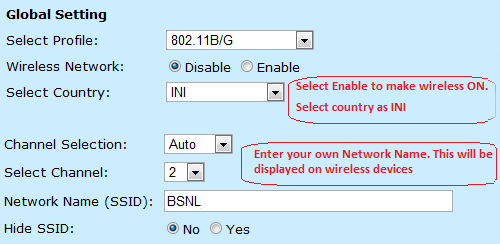
In this page, first check the Enable box. If it is already selected leave as it is. Enter your own choice network name (like ‘My Home’, ‘Ram’s Net’). Remember, this will be shown in the wireless devices when you search for available WiFi networks.
You are done with basic setup of your modem configuration at this point. But we stronglly suggest DO NOT LEAVE YOUR WIFI OPEN TO PUBLIC. Please go through the security settings at this page Secure your BSNL wireless modem from intruders. Still If you want to skip the security settings please follows the steps here. As next step you can go for modem reboot to save your settings and reboot.
How do you do a Modem Reboot
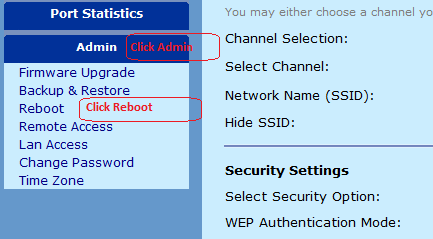
Now click on Admin menu. Another menu will be appearing. In that menu click on Reboot.
In this screen, click on the reboot button.
Wait for some time for the modem gets rebooted. After rebooting, verify that power, DSL, Internet, WLAN and any Ethernet lights are glowing in green in the modem. After verifying this lights, you can start connecting wireless device by searching from the device. The Network ID given in the modem will be displayed in your Laptop or WiFi device. Then click connect, it will be prompting for Key/password. Input the key/password selected above and click connect. Then your device will be connected automatically. Now you can enjoy internet on your wireless devices. Notify me of follow-up comments by email. Notify me of new posts by email.
Δ


